Note
Click here to download the full example code
Semantic Segmentation Tutorial#
In this tutorial, you will learn how to validate your semantic segmentation model using deepchecks test suites. You can read more about the different checks and suites for computer vision use cases at the examples section.
If you just want to see the output of this tutorial, jump to Observing the results: section.
A semantic segmentation task is a task where every pixel of the image is labeled with a single class. Therefore, a common output of these tasks is an image of identical size to the input, with a vector for each pixel of the probability for each class.
# Before we start, if you don't have deepchecks vision package installed yet, run:
import sys
!{sys.executable} -m pip install "deepchecks[vision]" --quiet --upgrade # --user

# or install using pip from your python environment
Defining the data and model#
# Importing the required packages
import matplotlib.pyplot as plt
import numpy as np
import torch
import torchvision.transforms.functional as F
Load Data#
The model in this tutorial is used to detect different objects in images (labels based on the Pascal VOC dataset). The model is trained to identify 20 different objects (person, bicycle etc.) and background. The dataset itself is the COCO128 dataset with semantic segmentation labels, mapped to the Pascal VOC labels (Originally, the COCO dataset includes more labels, but those has been filtered out) The dataset can be loaded as a pytorch DataLoader object from deepchecks.vision.datasets.segmentation, as is done in this tutorial, but can also be loaded as a SegmentationData object
# The full pascal VOC data and information can be found here: http://host.robots.ox.ac.uk/pascal/VOC/voc2012/
# And the COCO128 dataset can be found here: https://www.kaggle.com/datasets/ultralytics/coco128

from torchvision.utils import draw_segmentation_masks

from deepchecks.vision.datasets.segmentation.segmentation_coco import load_dataset, load_model
from deepchecks.vision.segmentation_data import SegmentationData

train_loader = load_dataset(object_type='DataLoader', train=True)
test_loader = load_dataset(object_type='DataLoader', train=False)
  0%|          | 0/7119623 [00:00<?, ?it/s]
  1%|          | 60416/7119623 [00:00<00:22, 313623.48it/s]
  4%|3         | 269312/7119623 [00:00<00:08, 764731.36it/s]
 16%|#5        | 1135616/7119623 [00:00<00:01, 3158676.37it/s]
 33%|###2      | 2326528/7119623 [00:00<00:01, 4558948.32it/s]
 70%|######9   | 4978688/7119623 [00:00<00:00, 10120764.97it/s]
7119872it [00:00, 8173523.38it/s]
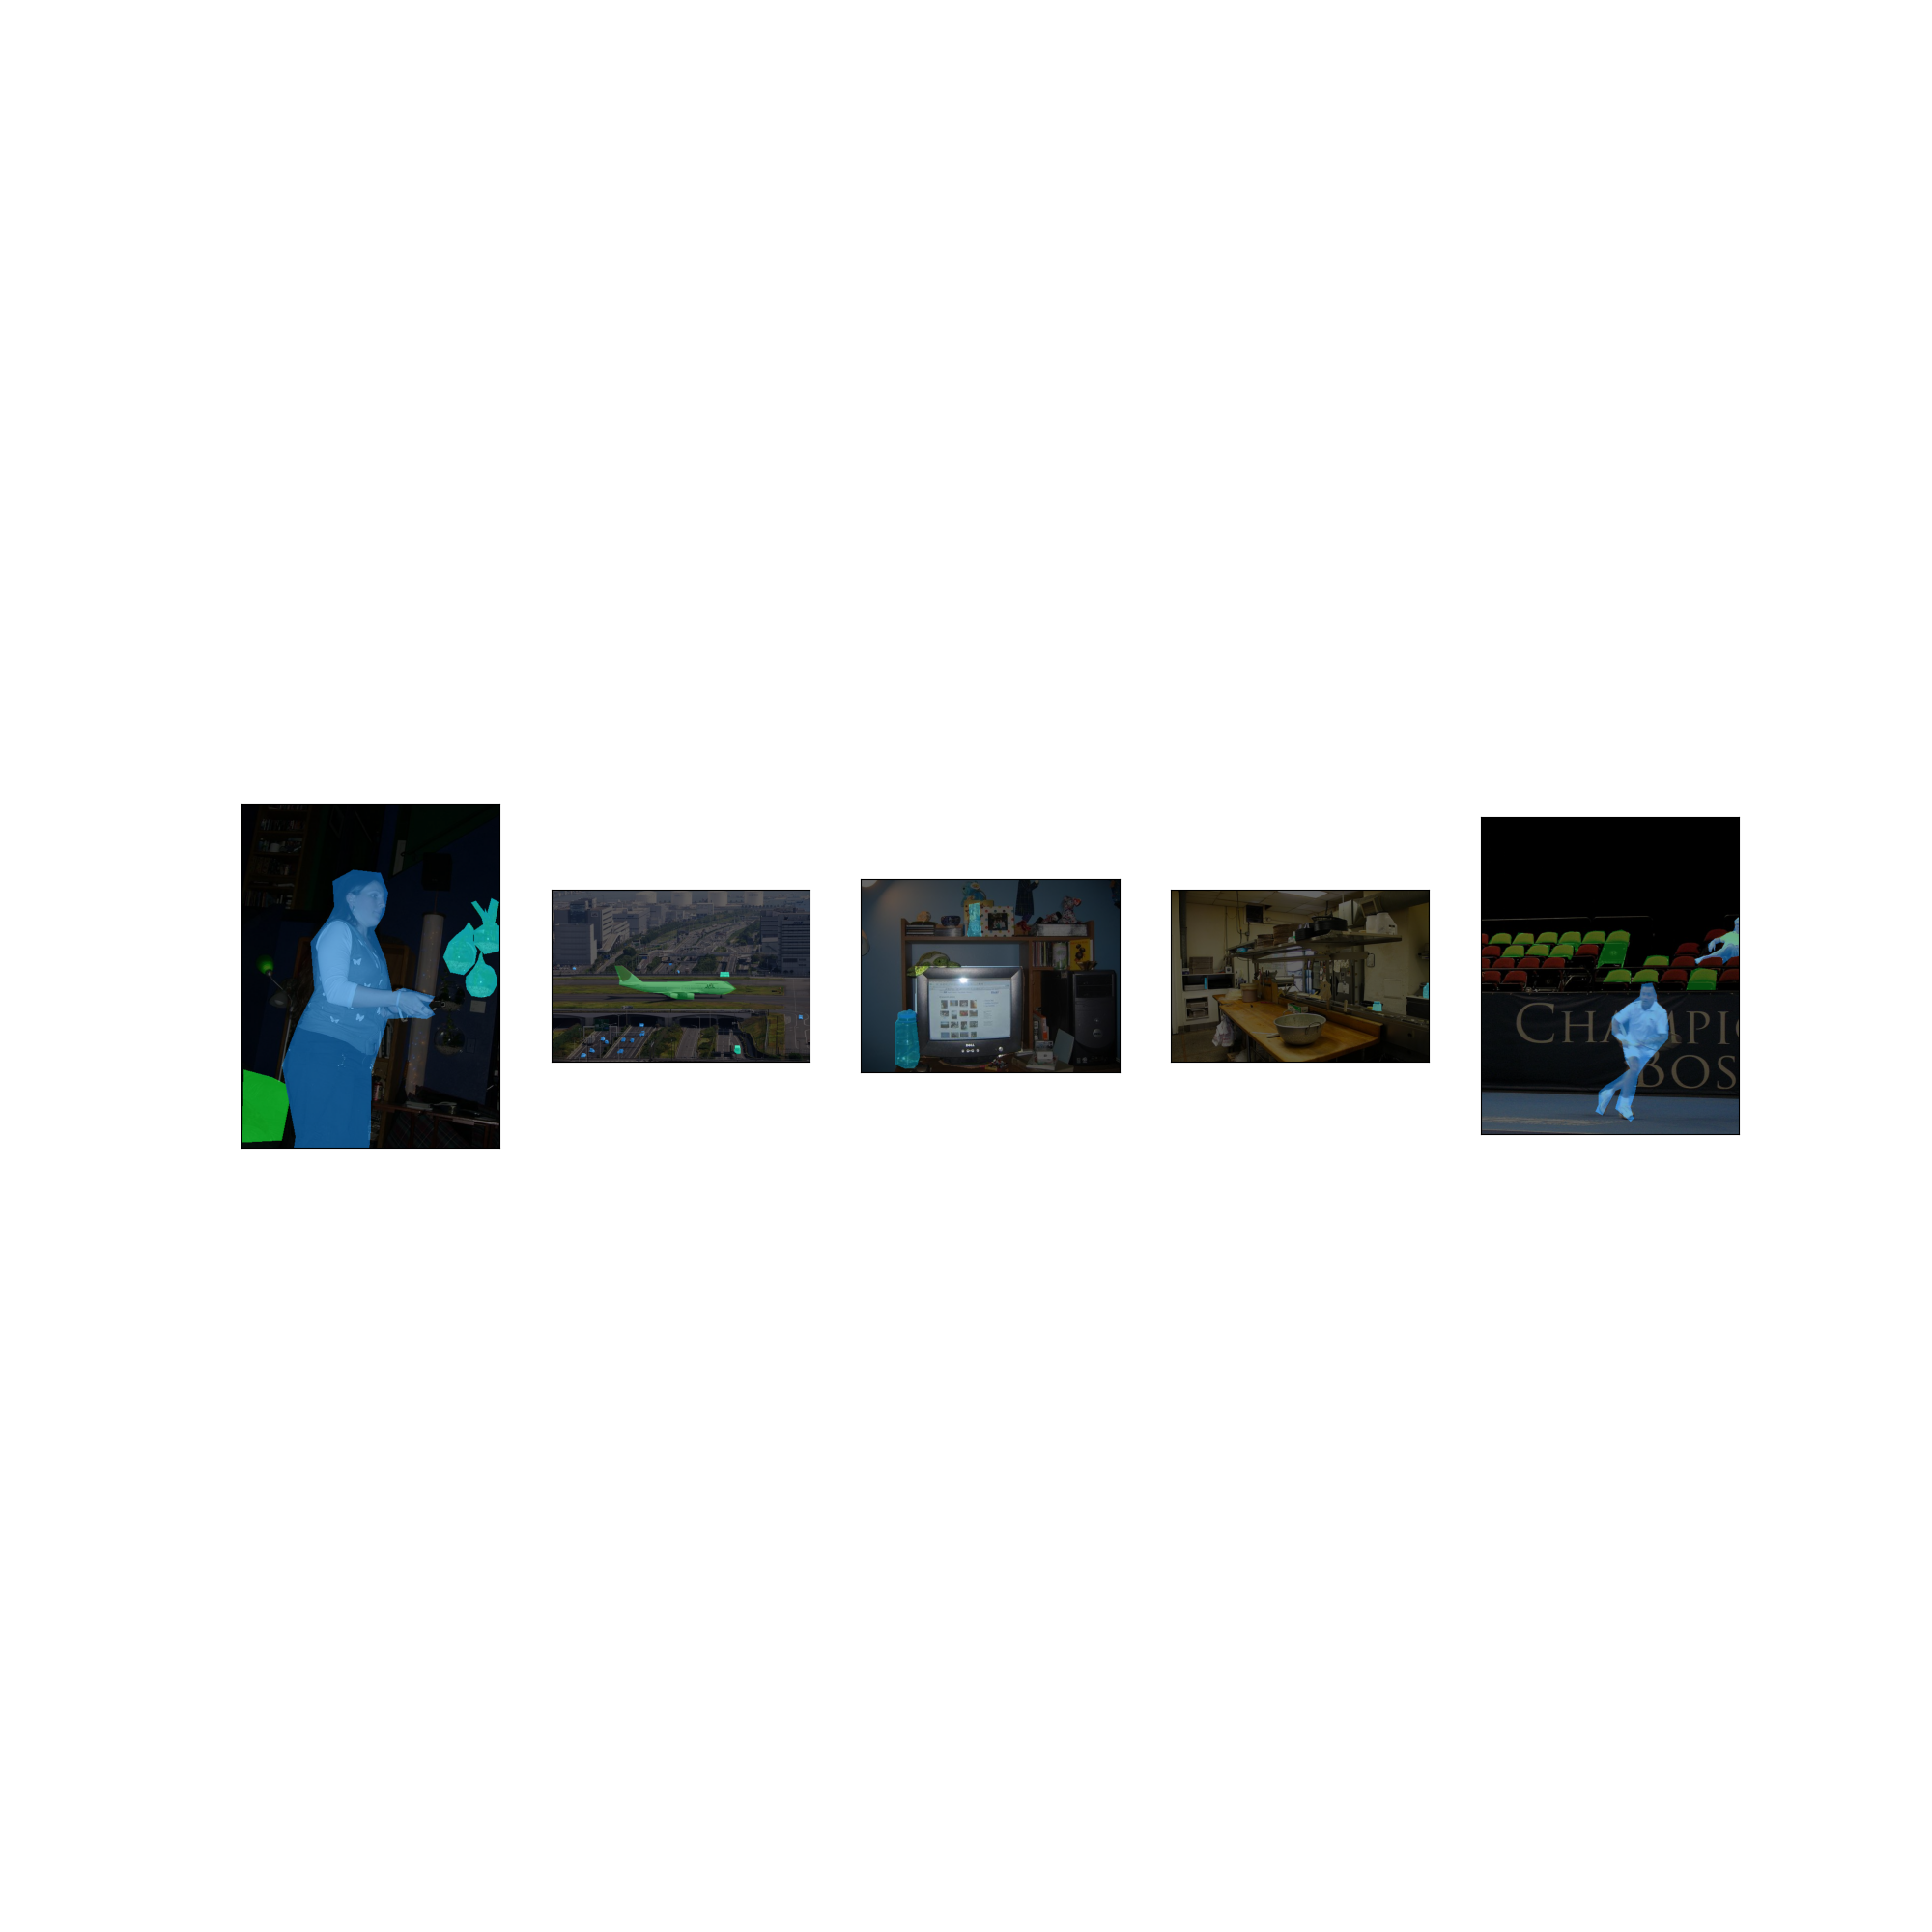
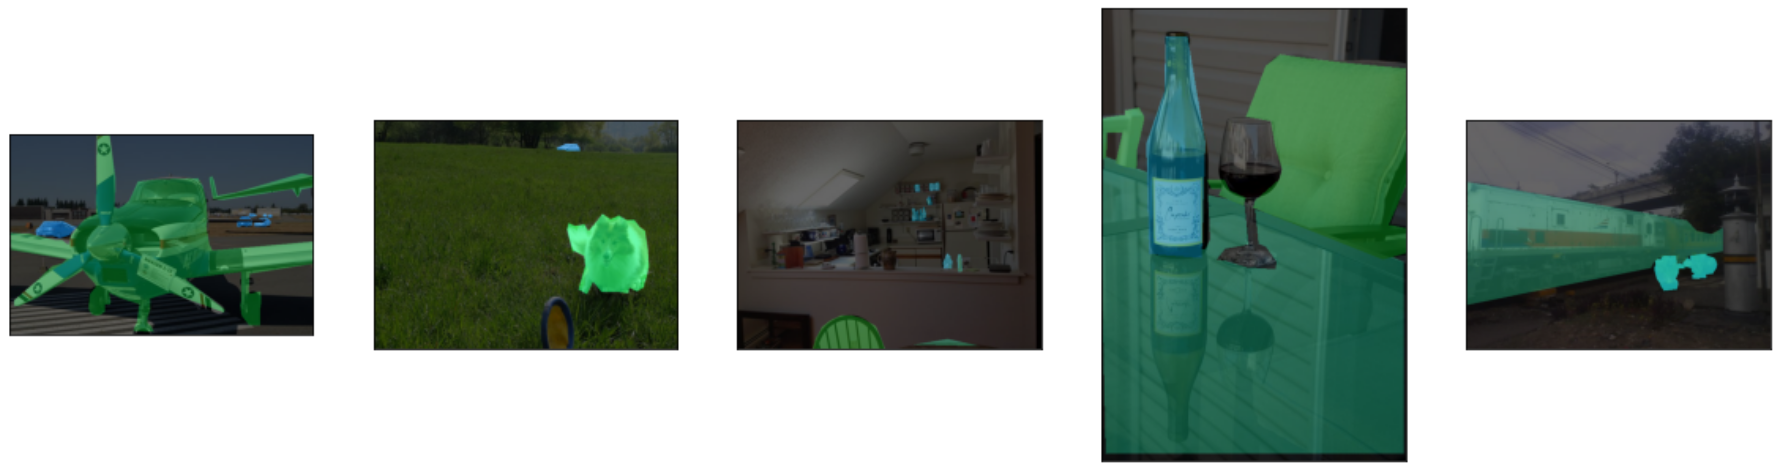
Visualize a Few Images#
Let’s visualize a few images with their segmentation, to understand the data augmentation.
batch = next(iter(test_loader))

masked_images = [draw_segmentation_masks(batch[0][i], masks=torch.stack([batch[1][i] == j for j in range(20)]),
                                         alpha=0.6) for i in range(5)]

fix, axs = plt.subplots(ncols=len(masked_images), figsize=(20, 20))
for i, img in enumerate(masked_images):
    img = img.detach()
    img = F.to_pil_image(img)
    axs[i].imshow(np.asarray(img))
    axs[i].set(xticklabels=[], yticklabels=[], xticks=[], yticks=[])

fix.show()
Downloading a Pre-trained Model#
In this tutorial, we will download a pre-trained LRSAPP model and a MobileNetV3 Large backbone from the official PyTorch repository. For more details, please refer to the official documentation.
device = torch.device("cuda") if torch.cuda.is_available() else torch.device("cpu")
model = load_model(pretrained=True, device=device)
Downloading: "https://download.pytorch.org/models/lraspp_mobilenet_v3_large-d234d4ea.pth" to /home/runner/.cache/torch/hub/checkpoints/lraspp_mobilenet_v3_large-d234d4ea.pth
Validating the Model With Deepchecks#
Now, after we have the training data, test data and the model, we can validate the model with deepchecks test suites.
Visualize the Data Loader and the Model Outputs#
First we’ll make sure we are familiar with the data loader and the model outputs.
batch = next(iter(train_loader))

print("Batch type is: ", type(batch))
print("First element is: ", type(batch[0]), "with len of ", len(batch[0]))
print("Example output of an image shape from the dataloader ", batch[0][0].shape)
print("Image values", batch[0][0])
print("-" * 80)

print("Second element is: ", type(batch[1]), "with len of ", len(batch[1]))
print("Example output of a label shape from the dataloader ", batch[1][0].shape)
Batch type is:  <class 'tuple'>
First element is:  <class 'list'> with len of  32
Example output of an image shape from the dataloader  torch.Size([3, 424, 640])
Image values tensor([[[107, 107, 107,  ..., 102, 102, 102],
         [107, 107, 107,  ..., 102, 102, 102],
         [107, 107, 107,  ..., 102, 102, 102],
         ...,
         [237, 217, 194,  ..., 127, 123, 129],
         [209, 236, 229,  ..., 123, 123, 133],
         [204, 230, 211,  ..., 115, 108, 117]],

        [[142, 142, 142,  ..., 139, 139, 139],
         [142, 142, 142,  ..., 139, 139, 139],
         [142, 142, 142,  ..., 139, 139, 139],
         ...,
         [235, 215, 192,  ..., 125, 121, 127],
         [206, 233, 226,  ..., 121, 121, 131],
         [201, 227, 208,  ..., 113, 106, 115]],

        [[184, 184, 184,  ..., 183, 183, 183],
         [184, 184, 184,  ..., 183, 183, 183],
         [184, 184, 184,  ..., 183, 183, 183],
         ...,
         [223, 203, 180,  ..., 113, 109, 115],
         [197, 224, 217,  ..., 109, 109, 119],
         [192, 218, 199,  ..., 101,  94, 103]]], dtype=torch.uint8)
--------------------------------------------------------------------------------
Second element is:  <class 'list'> with len of  32
Example output of a label shape from the dataloader  torch.Size([424, 640])
Implementing the SegmentationData class#
The checks in the package validate the model & data by calculating various quantities over the data, labels and
predictions. In order to do that, those must be in a pre-defined format, according to the task type.
The first step is to implement a class that enables deepchecks to interact with your model and data and transform
them to this pre-defined format, which is set for each task type.
In this tutorial, we will implement the semantic segmentation task type by implementing a class that inherits from the
deepchecks.vision.segmentation_data.SegmentationData class.
The SegmentationData class contains additional data and general methods intended for easy access to relevant metadata
for semantic segmentation ML models validation.
To learn more about the expected format please visit the API reference for the
deepchecks.vision.segmentation_data.SegmentationData class.
class CocoSegmentationData(SegmentationData):
    """Class for loading the COCO segmentation dataset, inherits from :class:`~deepchecks.vision.SegmentationData`.

    Implement the necessary methods to load the dataset.
    """

    def batch_to_labels(self, batch):
        """Extract from the batch only the labels and return the labels in format (H, W).

        See SegmentationData for more details on format.
        """
        return batch[1]

    def infer_on_batch(self, batch, model, device):
        """Infer on a batch of images and return predictions in format (C, H, W), where C is the class_id dimension.

        See SegmentationData for more details on format.
        """
        normalized_batch = [F.normalize(img.unsqueeze(0).float() / 255,
                                        mean=[0.485, 0.456, 0.406], std=[0.229, 0.224, 0.225]) for img in batch[0]]

        predictions = [model(img)["out"].squeeze(0).detach() for img in normalized_batch]
        predictions = [torch.nn.functional.softmax(pred, dim=0) for pred in predictions]

        return predictions

    def batch_to_images(self, batch):
        """Convert the batch to a list of images, where each image is a 3D numpy array in the format (H, W, C)."""
        return [tensor.numpy().transpose((1, 2, 0)) for tensor in batch[0]]
After defining the task class, we can validate it by running the following code:
# The label_map is a dictionary that maps the class id to the class name, for display purposes.
LABEL_MAP = {0: 'background', 1: 'airplane', 2: 'bicycle', 3: 'bird', 4: 'boat', 5: 'bottle', 6: 'bus', 7: 'car',
             8: 'cat', 9: 'chair', 10: 'cow', 11: 'dining table', 12: 'dog', 13: 'horse', 14: 'motorcycle',
             15: 'person', 16: 'potted plant', 17: 'sheep', 18: 'couch', 19: 'train', 20: 'tv'}

training_data = CocoSegmentationData(data_loader=train_loader, label_map=LABEL_MAP)
test_data = CocoSegmentationData(data_loader=test_loader, label_map=LABEL_MAP)

training_data.validate_format(model, device=device)
test_data.validate_format(model, device=device)

# And observe the output:
Deepchecks will try to validate the extractors given...
Structure validation
--------------------
Label formatter: Pass!
Prediction formatter: Pass!
Image formatter: Pass!

Content validation
------------------
For validating the content within the structure you have to manually observe the classes, image, label and prediction.
Examples of classes observed in the batch's labels: [[0, 7, 19], [0, 11, 15, 16], [0, 12], [0, 14], [0, 16]]
Visual images & label & prediction: should open in a new window
*******************************************************************************
This machine does not support GUI
The formatted image was saved in:
/home/runner/work/deepchecks/deepchecks/docs/source/user-guide/vision/quickstarts/deepchecks_formatted_image.jpg
Visual example of an image.
validate_extractors can be set to skip the image saving or change the save path
*******************************************************************************
Deepchecks will try to validate the extractors given...
Structure validation
--------------------
Label formatter: Pass!
Prediction formatter: Pass!
Image formatter: Pass!

Content validation
------------------
For validating the content within the structure you have to manually observe the classes, image, label and prediction.
Examples of classes observed in the batch's labels: [[0, 1, 6, 7], [0, 8], [0, 15], [0, 5, 20], [0, 8, 16, 18]]
Visual images & label & prediction: should open in a new window
*******************************************************************************
This machine does not support GUI
The formatted image was saved in:
/home/runner/work/deepchecks/deepchecks/docs/source/user-guide/vision/quickstarts/deepchecks_formatted_image (1).jpg
Visual example of an image.
validate_extractors can be set to skip the image saving or change the save path
*******************************************************************************
Running Deepchecks’ model evaluation suite on our data and model!#
Now that we have defined the task class, we can validate the model with the model evaluation suite of deepchecks. This can be done with this simple few lines of code:
from deepchecks.vision.suites import model_evaluation

suite = model_evaluation()
result = suite.run(training_data, test_data, model, device=device)
Validating Input:
|     | 0/1 [Time: 00:00]
Validating Input:
|#####| 1/1 [Time: 00:07]
Validating Input:
|#####| 1/1 [Time: 00:07]

Ingesting Batches - Train Dataset:
|     | 0/2 [Time: 00:00]

Ingesting Batches - Train Dataset:
|##5  | 1/2 [Time: 00:10]

Ingesting Batches - Train Dataset:
|#####| 2/2 [Time: 00:15]

Ingesting Batches - Train Dataset:
|#####| 2/2 [Time: 00:15]


Computing Single Dataset Checks - Train Dataset:
|     | 0/4 [Time: 00:00]


Computing Single Dataset Checks - Train Dataset:
|#####| 4/4 [Time: 00:07, Check=Image Segment Performance]


Computing Single Dataset Checks - Train Dataset:
|#####| 4/4 [Time: 00:07, Check=Image Segment Performance]


Ingesting Batches - Test Dataset:
|     | 0/2 [Time: 00:00]


Ingesting Batches - Test Dataset:
|##5  | 1/2 [Time: 00:10]


Ingesting Batches - Test Dataset:
|#####| 2/2 [Time: 00:16]


Ingesting Batches - Test Dataset:
|#####| 2/2 [Time: 00:16]


Computing Single Dataset Checks - Test Dataset:
|     | 0/4 [Time: 00:00]


Computing Single Dataset Checks - Test Dataset:
|#####| 4/4 [Time: 00:07, Check=Image Segment Performance]


Computing Single Dataset Checks - Test Dataset:
|#####| 4/4 [Time: 00:07, Check=Image Segment Performance]


Computing Checks:
|     | 0/4 [Time: 00:00]


Computing Checks:
|     | 0/4 [Time: 00:00, Check=Class Performance]


Computing Checks:
|     | 0/4 [Time: 00:00, Check=Train Test Prediction Drift]


Computing Checks:
|##5  | 2/4 [Time: 00:00, Check=Train Test Prediction Drift]


Computing Checks:
|##5  | 2/4 [Time: 00:00, Check=Simple Model Comparison]


Computing Checks:
|##5  | 2/4 [Time: 00:00, Check=Model Error Analysis]


Computing Checks:
|#####| 4/4 [Time: 00:00, Check=Model Error Analysis]
Observing the results:#
The results can be saved as a html file with the following code:
result.save_as_html('output.html')
'output (1).html'
Or, if working inside a notebook, the output can be displayed directly by simply printing the result object:
result.show()
Total running time of the script: ( 1 minutes 15.371 seconds)