Setting Up a New Tabular Model#
This guide provides a deep dive into the process and reviews the different options for setting up a new tabular model and model version. For a more streamlined guide that will quickly take you through the essentials of getting started with deepchecks for tabular data, see the Tabular Quickstart. For a more detailed guide on uploading production data to Deepchecks, see the Sending Tabular Production Data guide.
In order to start working with deepchecks, you must first instantiate a
DeepchecksClient object. To do that, first generate a
personal API token using the application’s dashboard:
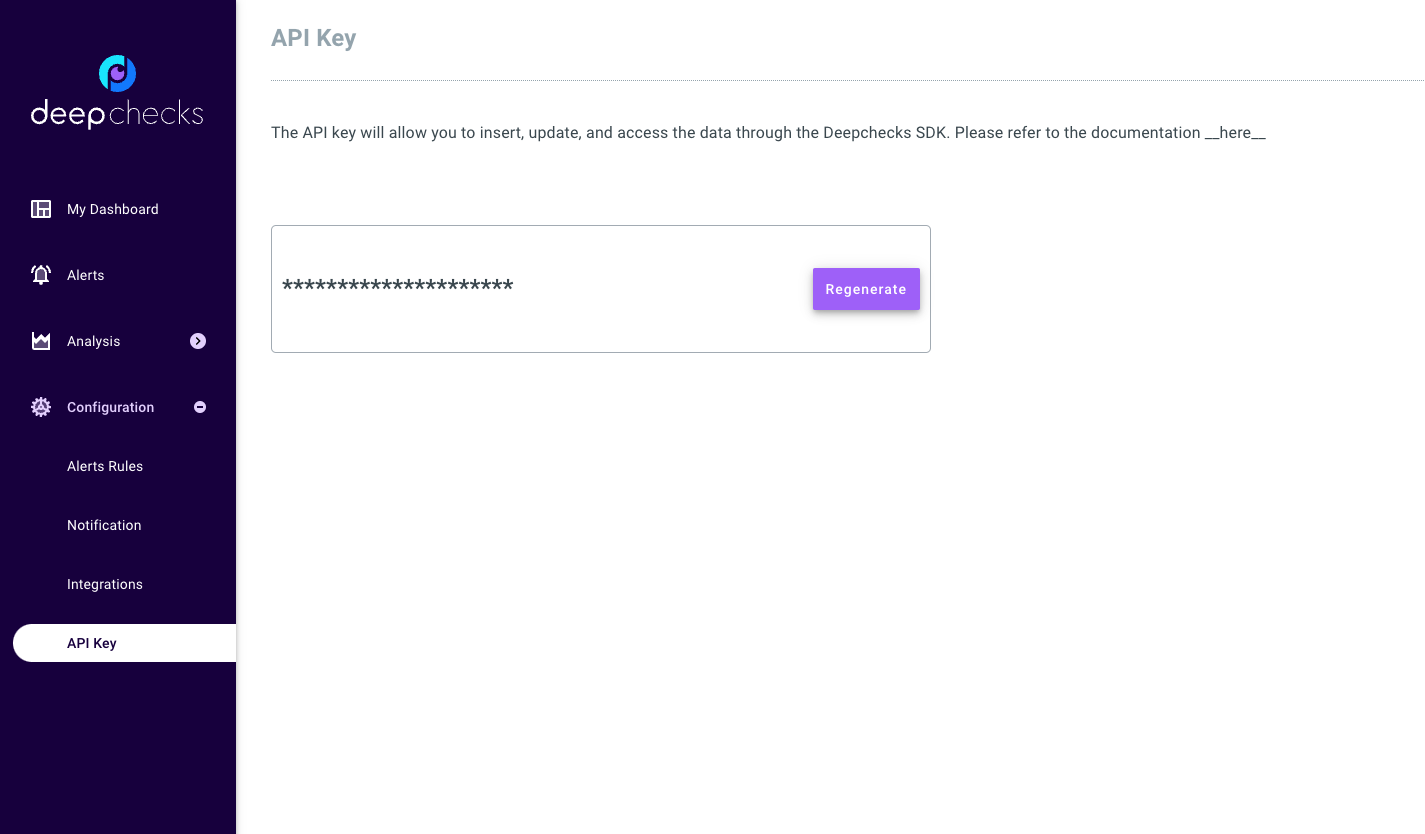
Then you should create the DeepchecksClient (API reference) object:
>>> import os
>>> from deepchecks_client import DeepchecksClient
>>> host = os.environ.get('DEEPCHECKS_API_HOST')  # Replace this with https://app.deepchecks.com
>>> # Make sure to put the API token in your environment variables. Or alternatively (less recommended):
>>> # os.environ['DEEPCHECKS_API_TOKEN'] = 'uncomment-this-line-and-insert-your-api-token-here'
>>> dc_client = DeepchecksClient(host=host, token=os.getenv('DEEPCHECKS_API_TOKEN'))
Once you have the client all set up, this guide will walk you through the following steps:
There are two distinct ways to set up a new tabular model. The “fast” way that is demonstrated in the
tabular quickstart handles the model creation, model
version creation, and reference dataset upload in a single call to the
create_tabular_model_version method of the
DeepchecksClient object. In this guide, we will cover each of these individual steps for setting up a
new tabular model in depth, and discuss their optional parameters in greater detail. All configuration options described
here for the individual steps are also available in the create_tabular_model_version method, so this guide is the
place to go also for a more detailed understanding of the options available in the quickstart.
Creating a New Model#
In Deepchecks, a model represents a ML pipeline performing a single task in production. The model groups together all the model versions that are performing the same task, e.g. versions representing model retrains.
Creating a model is our first and simplest step, as it only requires the model name, and a task type. The model name is a unique identifier for the model in the deepchecks monitoring system and used to later add versions, monitors and alerts to that model. Possible task types are:
binary- Binary classificationmulticlass- Multiclass classificationregression- Regression
>>> model_name = 'my_model'  # Replace with your model name
>>> model = dc_client.get_or_create_model(name=model_name, task_type='regression')
Model my_model was successfully created!. Default checks, monitors and alerts added.
The same get_or_create_model can be used to
retrieve an existing model, if it already exists. In this case, the task type parameter is not needed.
Additional optional parameters for the model creation are:
description- A description of the model. What is the task this ML pipeline is performing? This will be displayed alongside the model in the deepchecks monitoring system.create_defaults- Whether to add default checks, monitors and alerts to the model. Default isTrue, but you can set it toFalseif you want to later manually add only the checks, monitors and alerts relevant to your use case.alerts_delay_labels_ratioandalerts_delay_seconds- See the Handling Delayed Labels in Alerts section of the production data guide for more details.
Deleting a Model#
You can always delete a model using:
>>> dc_client.delete_model(model_name)
The following model was successfully deleted: my_model
Permanently Deleting a Model
This will irreversibly delete the model, all model versions, and all associated datasets.
Creating a New Model Version#
A model version represents an instance of the model trained on specific data. Specifically, each change in the data schema must be mapped to a new model version. In addition, in most cases, it is also recommended to create a new model version after each retraining of the model for analysis purposes. A model may have one or more model versions.
A model version is created by calling version.
Apart from the mandatory name argument, there are a couple of other important arguments to this method:
schema(mandatory) - A file or dict describing the types and roles of the columns in the dataset. See the “Schema File” section for more details.feature_importance(recommended) - A dict or pandas Series containing the feature importance of the model. See the “Feature Importance” section for more details.model_classes(recommended for classification tasks) - An alphanumerically sorted list of the names of possible label classes known to the model. Deepchecks uses this list to map the model’s predicted probabilities array to the correct label classes. This is mandatory in case we wish to supply model probabilities for either the reference or production data.
An example of creating a model version (for a regression model, so model_classes is not needed):
>>> model_version = model.version('v1', schema=schema, feature_importance=feature_importance)
Model version v1 was successfully created.
Schema File#
A schema file is a prerequisite for creating a new model version. The schema file is a YAML file that
describes the types and roles of the columns in the version data. The file can either be manually created, or generated
using the create_schema method of the DeepchecksClient object.
The schema file must be in the structure demonstrated in the example below:
features:
    numeric_feature: numeric
    categorical_feature: categorical
additional_data:
    categorical_metadata: categorical
    timestamp_meta_data: datetime
    id_meta_data: integer
    numeric_metadata: numeric
Essentially the YAML file is a dictionary with two keys: features and additional_data. The features key
contains a dictionary of the features in the data, and their types. The additional_data is the same for columns that
are not used by the model itself - for e.g. metadata columns (such as user id, ip address, demographic data, etc…).
Columns with special roles, such as the label and
index columns, should not appear in the schema file.
The column types can be one of the following:
numeric- A numeric column - a numeric column with float or integer valuesinteger- An integer column - a numeric column with strictly integer valuescategorical- A categorical column (string or integer)boolean- A boolean column (True or False)text- A text column - usually used to describe a metadata column containing text
Automatically Generate a Schema File#
We’ll show an example for using this method on the Airbnb rent regression dataset, in which the rent of the Airbnb unit is predicted from a set of features describing the rental unit. We’ll also be using this dataset for the rest of the guide.
Automatically creating a schema file using the create_schema
method requires a deepchecks Dataset object. The dataset object
is a wrapper around the data itself that provides additional information about the data, such as the column roles.
In the following example we’ll use an already existing dataset object.
>>> from deepchecks.tabular.datasets.regression.airbnb import load_data_and_predictions

>>> ref_dataset, ref_predictions = load_data_and_predictions(data_format='Dataset')

>>> from deepchecks_client import create_schema, read_schema
>>> schema_file_path = 'schema_file.yaml'
>>> create_schema(dataset=ref_dataset, schema_output_file=schema_file_path)
Schema was successfully generated and saved to schema_file.yaml.
This will create a schema file in the current directory.
Reviewing the Schema File
It is highly recommended to manually review the created schema file before moving forward to creating the model version, as create_schema may fail to infer the type and role of some columns, or infer them incorrectly.
If the method has failed to infer the type of a column, it’s type will be none and you should manually set it to the correct type. Additionally, the only way the method has of inferring whether a column is a feature or additional_data is if this information was defined within the Dataset object. If that information is missing, the column will be classified as a feature, and you should manually change it to additional_data if that is the case.
An alternative method for editing and passing the schema is as a dict. You can then load the file to a dict using
the read_schema method:
>>> schema = read_schema(schema_file_path)
>>> import pprint
>>> pprint.pprint(schema)
{'additional_data': {},
 'features': {'availability_365': 'integer',
              'calculated_host_listings_count': 'integer',
              'has_availability': 'categorical',
              'minimum_nights': 'integer',
              'neighbourhood': 'categorical',
              'neighbourhood_group': 'categorical',
              'number_of_reviews': 'integer',
              'reviews_per_month': 'numeric',
              'room_type': 'categorical'}}
You can set the read_schema method to fail if there are any invalid
(type none) columns by setting:
>>> schema = read_schema(schema_file_path, fail_on_invalid_column=True)
Feature Importance#
Deepchecks uses feature importance to prioritize the display of features within checks and to weight the drift of different features among other things. While passing feature importance isn’t mandatory, the quality of the displayed results and alerts that can be received will be significantly better if feature importance is provided.
Feature importance can either be a dict of feature names to their importance, or a pandas Series with the feature names
as the index and the importance as the values. The importance is a positive numeric value, normalized such that the sum
of the values for all of the features is 1. You can set the feature importance for a model version using the
set_feature_importance method:
>>> model.set_feature_importance(feature_importance)
Feature importance of v1 model version was updated.
If you do not have the feature importance for your features ready, you can use deepchecks OSS built-in feature importance calculation method:
>>> from deepchecks.tabular.feature_importance import calculate_feature_importance
>>> feature_importance = calculate_feature_importance(dataset=ref_dataset, model=my_model)
For more details about computing feature importance and it’s uses in deepchecks, see the feature importance guide.
Uploading a Reference Dataset#
Reference data is a dataset to which we wish to compare our production data stream for a given model version. Providing reference data is optional, yet many important checks such as Feature Drift (Tabular Version) cannot run without it.
The reference data must be a deepchecks Dataset object. We’ll use the dataset object already used earlier in this guide to create the schema file.
Apart from the dataset itself that contains the features, metadata and labels, we must also provide the model
predictions. The model predictions are a numpy array containing the predicted class for each row in the dataset.
Predicted Probabilities - for Classification Tasks
For classification models we may also provide the model prediction_probas. These are the model’s
predicted probabilities for each class and row in the dataset. The probabilities must be a numpy array of shape
(n_samples, n_classes), when the i-th column corresponds to the predicted probability for the class in the i-th
place in the alphanumerically sorted list of model classes (see the model_classes argument of the
version method). Providing the
probabilities will enable Deepchecks to compute probability-dependant metrics such as ROC AUC and let it compute
better drift scores on the model predictions.
To upload reference data for the previously created version, simply run:
>>> model_version.upload_reference(ref_dataset, predictions=ref_predictions)
Reference data uploaded.
Not providing prediction_probas in this case, as it is a regression task.
Selecting the Reference Data
It is important that the reference data represents the data distribution of a dataset on which we are reasonably certain the model performs well. Typically this will be the dataset on which the model was trained, but it is not uncommon for production data to have an inherently different distribution or schema than the training data (e.g. different class distribution), or for training data to be entirely unavailable. In such cases, the reference data can be for example the first month of production data or a sample thereof, given that we have made sure that the model’s performance on this data is acceptable.